Loading...
Account
Cart0
Loading...
At Club Piscine, we believe that the best way to winterize your hot tub is to keep using it during winter. You are not planning on using your hot tub regularly this winter? Then, you will need to close it completely.
To minimize the risk of freezing, it is recommended to winterize your spa before the outside temperature drops below 5 degrees.
Before you get started, make sure you have all the required materials at your disposal so you can close your spa without interruption. You will find the complete list of the required material at the bottom of this page.
Here is how to winterize your hot tub in 5 steps.
Start by removing the spa cover. If possible, leave it hanging on the cover lifter.
Take the time to thoroughly inspect your hot tub. Look at the cabinet, and make sure there are no cracks or damage.
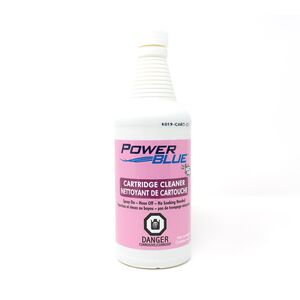
Open the skimmer’s lid, then remove the filter cartridges. They will need to be cleaned. You will need a vat or a tank that is large enough in order to be able to soak the cartridges in a mixture of water and special formulated cartridge cleaner for 8 hours. Make sure you follow the instructions on the bottle for the recommended dosage.
Once the cartridges are clean, rinse them directly with your garden hose, from top to bottom. Make sure you also rinse the inside.
Let them dry, then store them in a dry, frost-free place for winter.
Now it is time for you to clean your spa. This procedure aims to give the plumbing a good cleaning before closing your hot tub.
First, you want to make sure that there is enough water in your spa. The ideal level is usually about 1 inch below the headrests. Fill the spa if necessary.
Turn on all the spa jets as this will allow the cleaning product to circulate through all the water lines.
Close your spa’s air valves. These typically resemble a small push button.
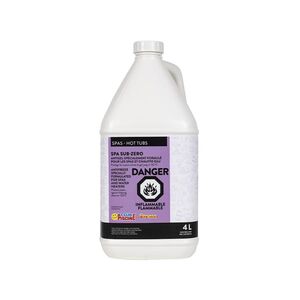
Pour half of the bottle of piping cleaner directly into the water.
Run the spa pumps for 2 or 3 complete cycles. Follow the instructions on the bottle if needed.
The chemicals contained in the cleaner are quite strong. Make sure you do not put the cover back on during the cleaning process.
Once the cleaning cycles are complete and the hot tub is turned off, shut off the outdoor breaker. As an additional precaution, you should also shut off the indoor breaker.
It is now time to drain the water from the hot tub. In order to do so, choose one of the methods below:
By gravity, this longest option.
By using a submersible pump, the most efficient method.
Gravity draining is done directly through the spa drain:
Locate the spa drain. (It is typically located at the bottom, either opposite the console or on the right corner of the spa.)
Remove the drainage plug, then screw in your garden hose.
Once your hose is connected, unscrew the ring of the drain or pull on the garden hose to activate the water flow in the drain. You should feel the water pressure in the hose.
It should take approximately 4 to 6 hours to empty all the water.
Draining the spa with a submersible pump can be done much quicker:
Gently lower the submersible pump at the bottom of the hot tub.
Position the drain hose where you need it and then turn on the pump.
Depending on the pumping force, it will take on average 30 minutes to drain the spa. Make sure you stay close to prevent the pump from running dry.
Moreover, regardless of the drainage method used, it is normal for some water to remain at the bottom of the spa and on the seats. You can soak up the excess water using a towel or even a wet/dry vacuum.
Note: If you emptied the spa with a pump, before removing the residual water, you will need to unblock the drain. Indeed, the water needs to run out through the bottom drain when you remove the residual water.
It is at this step that you will have to remove all residual water from the hot tub. Actually, it is the most important part of the entire process, so you will want to pay close attention to it. If you are not sure, consult your local Club Piscine Super Fitness store.
Several techniques can be used to remove all the water from the spa. In this article, we will be covering the process which consists of removing residual water through the pumps, a common approach that can be used for all spa brands and that yields the best results.
In this capsule, the hot tub is equipped with a total of three pumps:
2 main pumps that push the water towards the various jets, and 1 circulation pump that circulates the water.
Regardless of the number and types of pumps, the same logic applies :
Disconnect the pipe that is easiest to access.
Then, using a vacuum, blow or suction the water directly out of the pipe.
To drain the water from the remaining pipe, which could be harder to access, you will need to blow and suction the water directly from the pump. Then reconnect the hose.
Here is what you should do:
Start by removing the spa panel to gain access to the pumps and other technical components. Some panels may need to be unclipped; others unscrewed.
Locate and identify the various pumps.
To proceed, you will first need plumbing pliers; these will be useful for unscrewing the couplers that connect the pipes to the pump.
Start by unscrewing the pipe located at the front of the pump.
Once the pipe is disconnected, retrieve the O-ring.
We recommend you coat it with a specially formulated lubricant to help avoid leaks when you open your hot tub next spring.
Now it is time to use your wet/dry vacuum, which features two modes.
For optimal results, we recommend you use a wet/dry vacuum with a peak horsepower (PHP) of at least 5, equipped with a 2-inch nozzle. It will perfectly fit the plumbing of your spa’s components. It is also recommended that you clean your vacuum beforehand to avoid contaminating your hot tub.
Place the vacuum at the end of the disconnected pipe, then start the device in “BLOWER” mode to expel the excess water through the spa jets.
Continue until all the water is purged from the jets. Turn the bypass valves one at a time to help expel the water.
As the water is expelled from the plumbing, it will accumulate at the bottom of the spa. During this procedure, make sure the water level does not rise to where the suction drains are located, as this would allow water back into the pumps. You would then have to start the process all over again.
When no more water seems to be coming out of the jets, start the vacuum in “SUCTION” mode to recover the excess water inside the pipe.
When you activate the “SUCTION” mode, you should hear the water run through the vacuum head. If you no longer hear anything, it means the pipe is dry.
When this is done, repeat the procedure on the pump itself. Place the vacuum nozzle on the access point on your pump and activate the “BLOWER” mode.
Leave it there as long as you see water coming out of the jets. Once the water is expelled, repeat the process, but this time in “SUCTION” mode.
When the pipe and pump are dry, you can reconnect the couplers.
Make sure you refit the O-ring, then firmly tighten it by hand.
Repeat the previous steps for each of your spa’s additional pumps.
Once the water has been suctioned and blown out of all the pumps and pipes of your spa, 95% of the water should already have been removed. To ensure that no damage is caused to the spa during winter, you will have to continue the process of removing residual water, by focusing next on the inside of the spa.
If the skimmer’s lid is still in place, start by removing it.
Place the vacuum nozzle on one of the two skimmer drains.
Block the remaining skimmer drain with a shammy or even an expandable plug.
Run the vacuum in the suction mode for 30 seconds.
Repeat the procedure, this time in reverse order. Place the shammy or plug on the other drain and suction the water through the remaining opening.
Next, move on to the bottom drain. Place the vacuum over it and activate the “SUCTION” mode. Let it run for 15 to 20 seconds.
You should be able to remove most of the remaining water from the jets of your spa. These should still be in open position following the cleanup.
Place the vacuum nozzle over one of the jets and run the vacuum in the suction mode for 15 to 20 seconds.
Repeat the procedure for each jet of your spa.
We recommend you leave the jets in place for the winter. First of all, because not all jets are removable; you will avoid forcing and damaging a jet which cannot be removed. Also, this will simplify the opening process in the spring, as the jets will already be connected and in the open position.
Before using antifreeze, make sure you block the bottom drain and put the plug back on.
The rule of thumb when it comes to antifreeze is that you should use on average 1 gallon of antifreeze per the main pump. In this case, the spa is equipped with 2 main pumps, 2 gallons will therefore be required
Using a funnel, start by pouring 100 ml of antifreeze into each of the jet nozzles.
Once all the jets are winterized, pour about 250 ml of antifreeze into each one of your spa’s skimmer drains.
It is normal to see antifreeze pour out of the suction drains. If this is the case, you can stop filling the skimmer drains.
The remaining antifreeze will be used in the main pumps of the hot tub. To winterize them, you must first locate the bypass valve(s) of your spa, as they have direct access to the pumps.
First, remove the valve head by gently pulling on it. Next, unscrew the lid and pull on the plastic module to free the plumbing. Take care to leave the O-ring in place.
Pour the remaining antifreeze directly into the pipe ̶ about 250 ml per valve.
If some antifreeze accumulates at the bottom of the spa, it is important to soak it up using a cloth or a wet/dry vacuum to avoid staining your hot tub.
Now is a good time to clean the inside of your spa with a product specially formulated to clean acrylic. Take the time to thoroughly scrub the inside of your hot tub with a sponge or a soft cloth.
Put the lid back on the skimmer.
Congrats, your spa is now clean and dry! All that is left to do is protect the exterior of the spa to have nothing to worry about this winter
Although hot tub is equipped with a cover, it is not designed to handle the heavy snowfalls which occur in Quebec during winter. You will therefore need to reinforce it.
The simplest and cheapest way to do so is to use a giant Styrofoam block that you can purchase at any Club Piscine Super Fitness store.
Position the block in the middle of your spa, then draw a line approx. 1 inch above the spot where the cover usually rests.
Using a saw, cut the Styrofoam block at the line. The block should be slightly higher to allow air to circulate between the cover and the spa, which will help prevent mould growth on the cover.
To avoid having tiny pieces of Styrofoam inside the hot tub, we recommend you place your block in an oversized bag for the winter.
Replace the spa cover, while taking care to properly fasten it to the safety straps.
Wipe the cover with a damp cloth to remove the dirt and dust accumulated during the fall.
If your cover is made of vinyl, spray vinyl cleaner directly on the surface and scrub with a dry cloth or sponge.
Finally, the last step is to place a protective cover on your hot tub. Even if the spa cover has water-repellent properties, the use of a protective cover is necessary to prevent water from infiltrating during winter. You will find the perfect protective cover to suit your needs at your local Club Piscine Super Fitness store. To install it, simply place it over your spa and secure it with the elastic system to protect it from rain, snow, and wind.
On top of that, during winter, it is recommended to remove from your spa snow and ice buildups of more than 10 cm. You should opt for a broom instead of a shovel to avoid damaging the protective cover.
***
If you followed all the steps described in this article, you can rest assured that your spa will be clean and in good condition next spring.
However, if you have questions, require additional information on how to close your spa, or if you wish to entrust the task to an expert, please feel free to contact your local Club Piscine Super Fitness store. We would be more than happy to assist you.
Enjoy the cold season!